


Got 15 Minutes? How to Sew Felt Hearing Aids onto Any Stuffed Animal or Doll
We sewed tiny felt hearing aids onto our daughter's handmade doll in 15 minutes. Here's the method—including a no-sew option.
Why We Make Our Stuffies Match
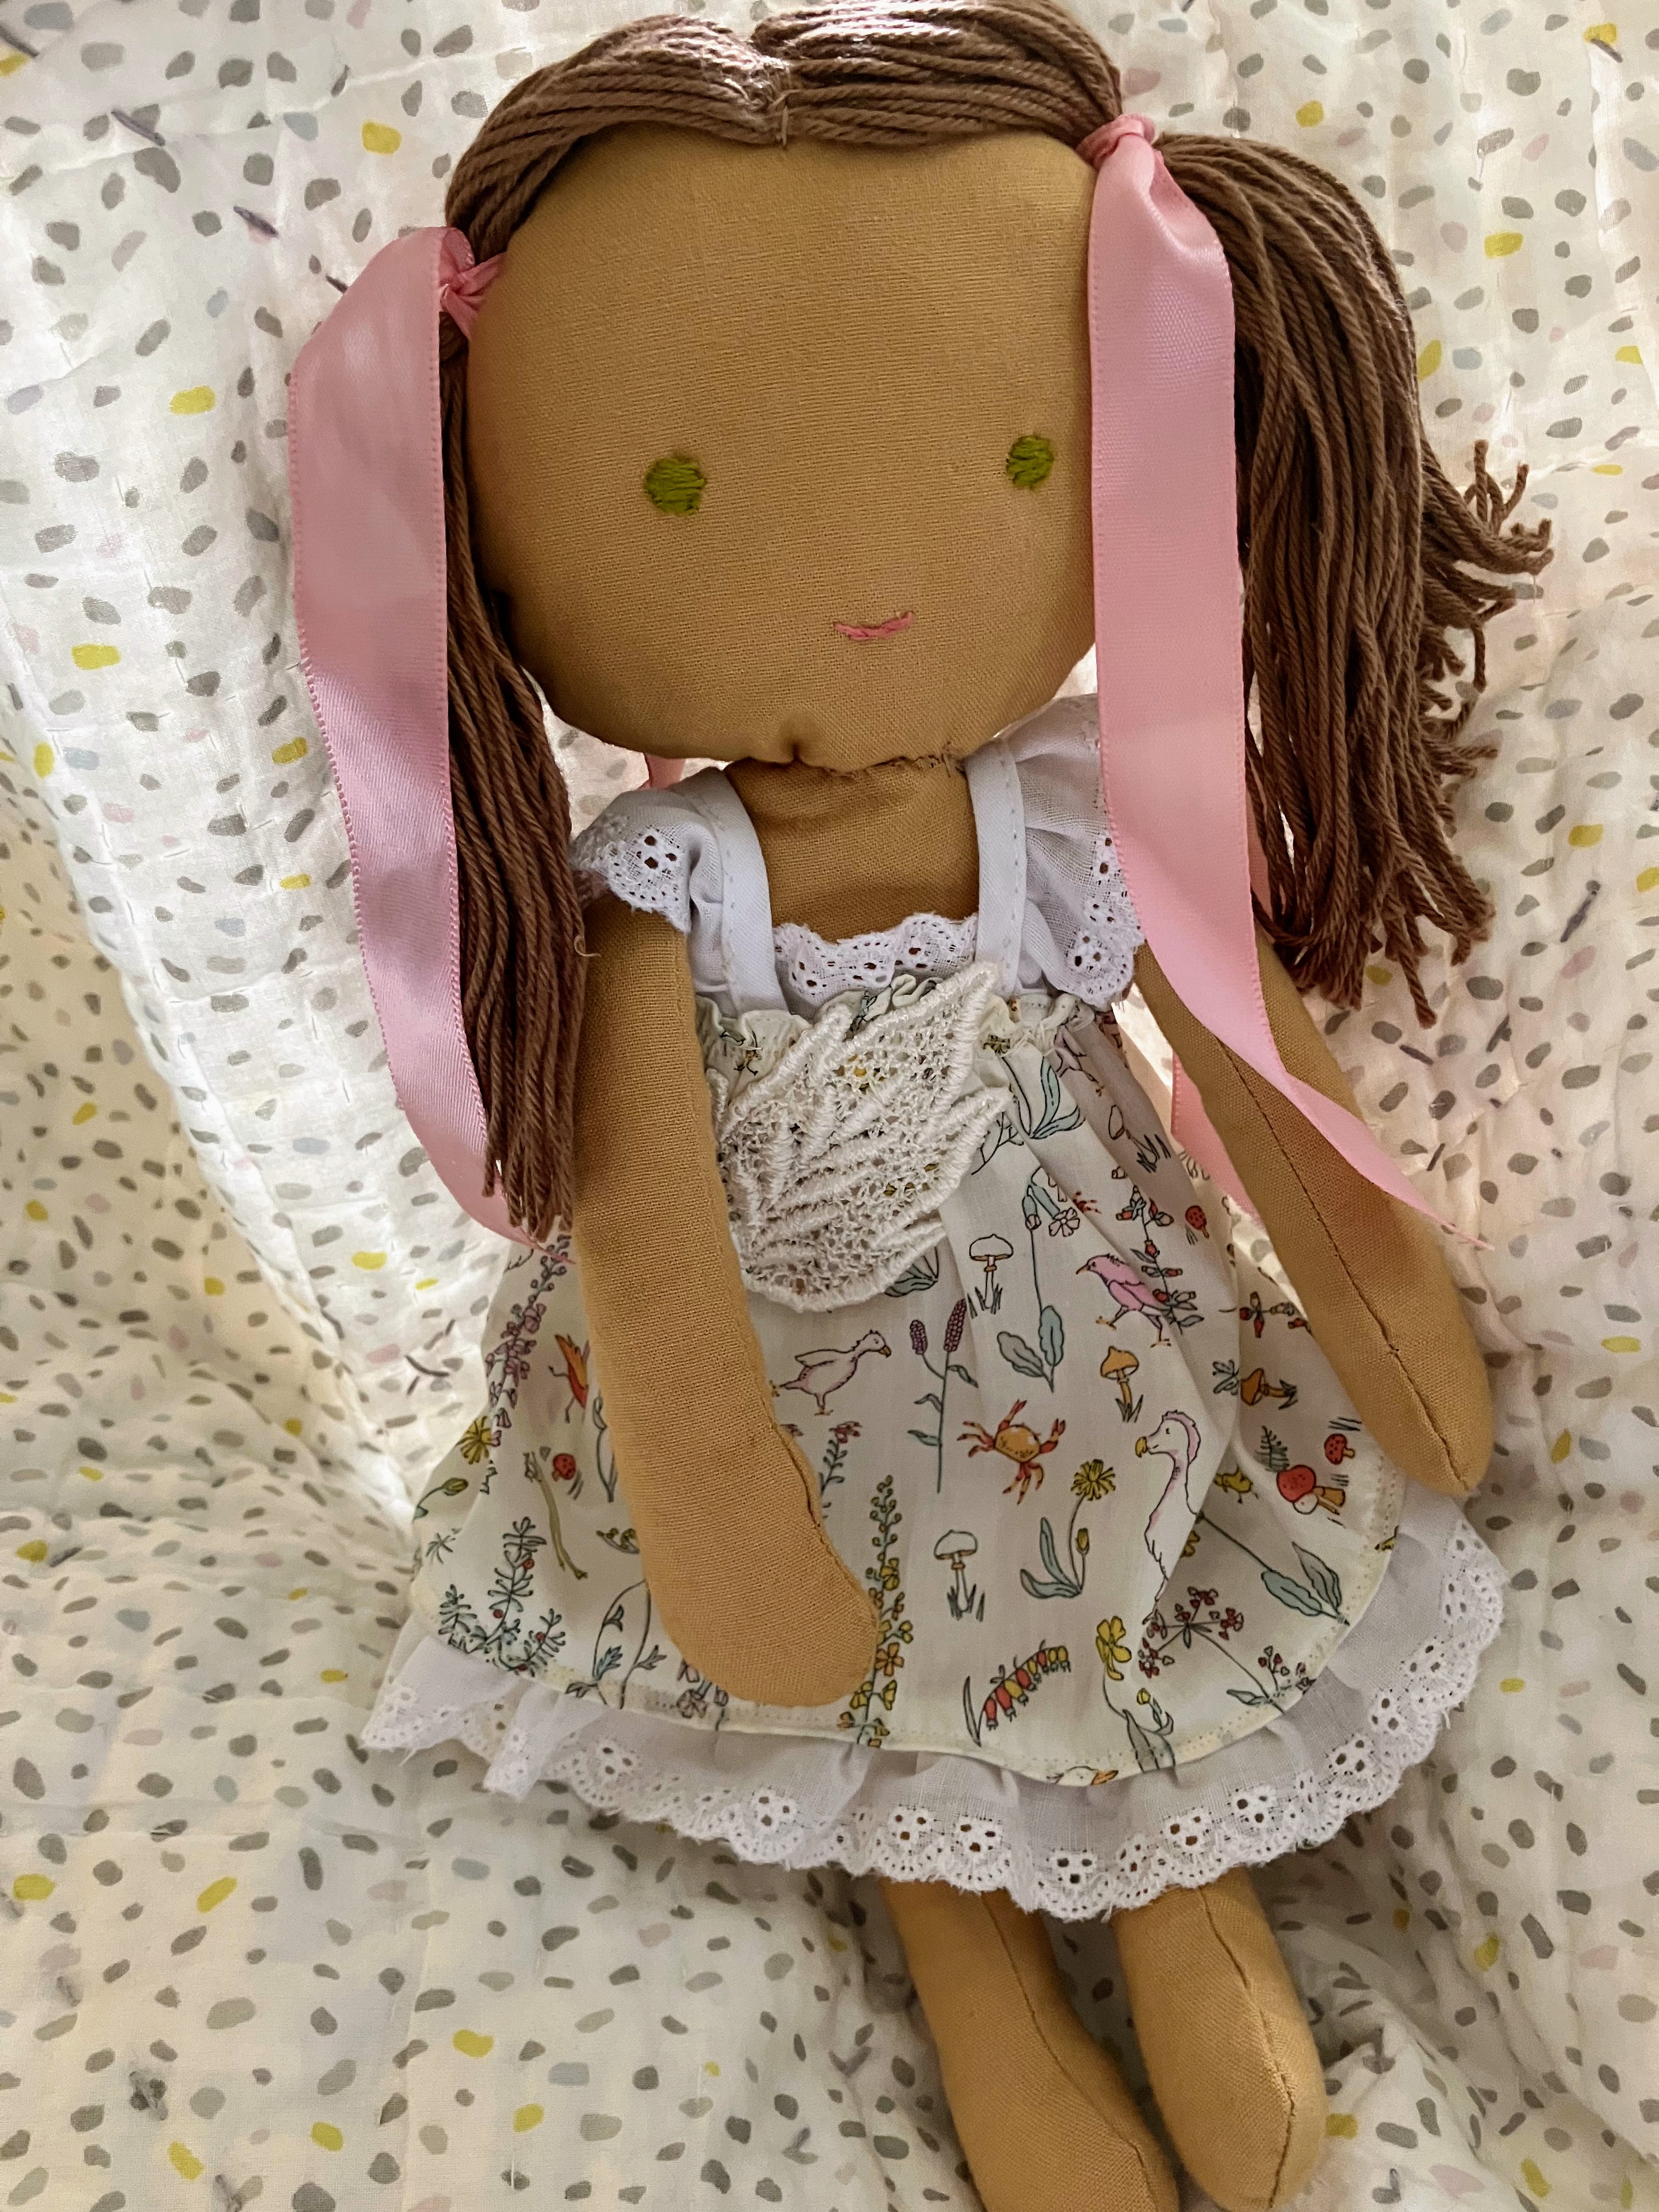
Representation in toys matters! Sometimes the toy that matters most is already in your child's arms. This project started because I made a flower fairy doll for my daughter before she was born, and when she was diagnosed with hearing loss and started wearing hearing aids, I wanted the doll to wear them too.
The method is simple: two small pieces of felt, shaped into hearing aids and sewn directly onto the stuffed animal's head. No special skills, no expensive materials, no waiting for a custom order to arrive. Fifteen minutes and a basic sewing kit.
If your child loves a specific stuffed animal—a dino, a fox, a bunny—this method works on any of them.
Hearing devices on toys encourage imaginative play and positive conversations about hearing loss. Looking for more ways to help your child relate to his or her hearing devices in a positive way? Check out our article on how to customize hearing devices with colors, stickers, charms, sparkles, and more!
Tools and Materials
- Stuffie
- Needle & Thread (Here's a basic hand sewing kit that makes customizing stuffed animals a breeze.)
- Scissors
- Felt (Check out Etsy for great values on felt fat quarters.)
Not into sewing? For a no-sew version, cut the same felt shapes and use a baby-safe fabric glue to attach them. (Aleene's Tacky Glue has a nontoxic formula.) Press and hold for 60 seconds. It won't be as durable as sewing, but it works beautifully as a first version.
Step 1 — Choose Your Stuffed Animal or Doll
Step 2 — Cut the Felt Hearing Aid Shapes

I cut out two small pieces of pink wool felt.
I love felt for these projects, because the edges don't fray. So, I can just cut the shape I want, and not worry about finishing the edges.
Etsy sellers offer packs of small fabric pieces, called fat quarters. That adds variety to a craft drawer without costing a million dollars.

Step 3 — Thread the Needle and Position the Knot
I threaded my needle.
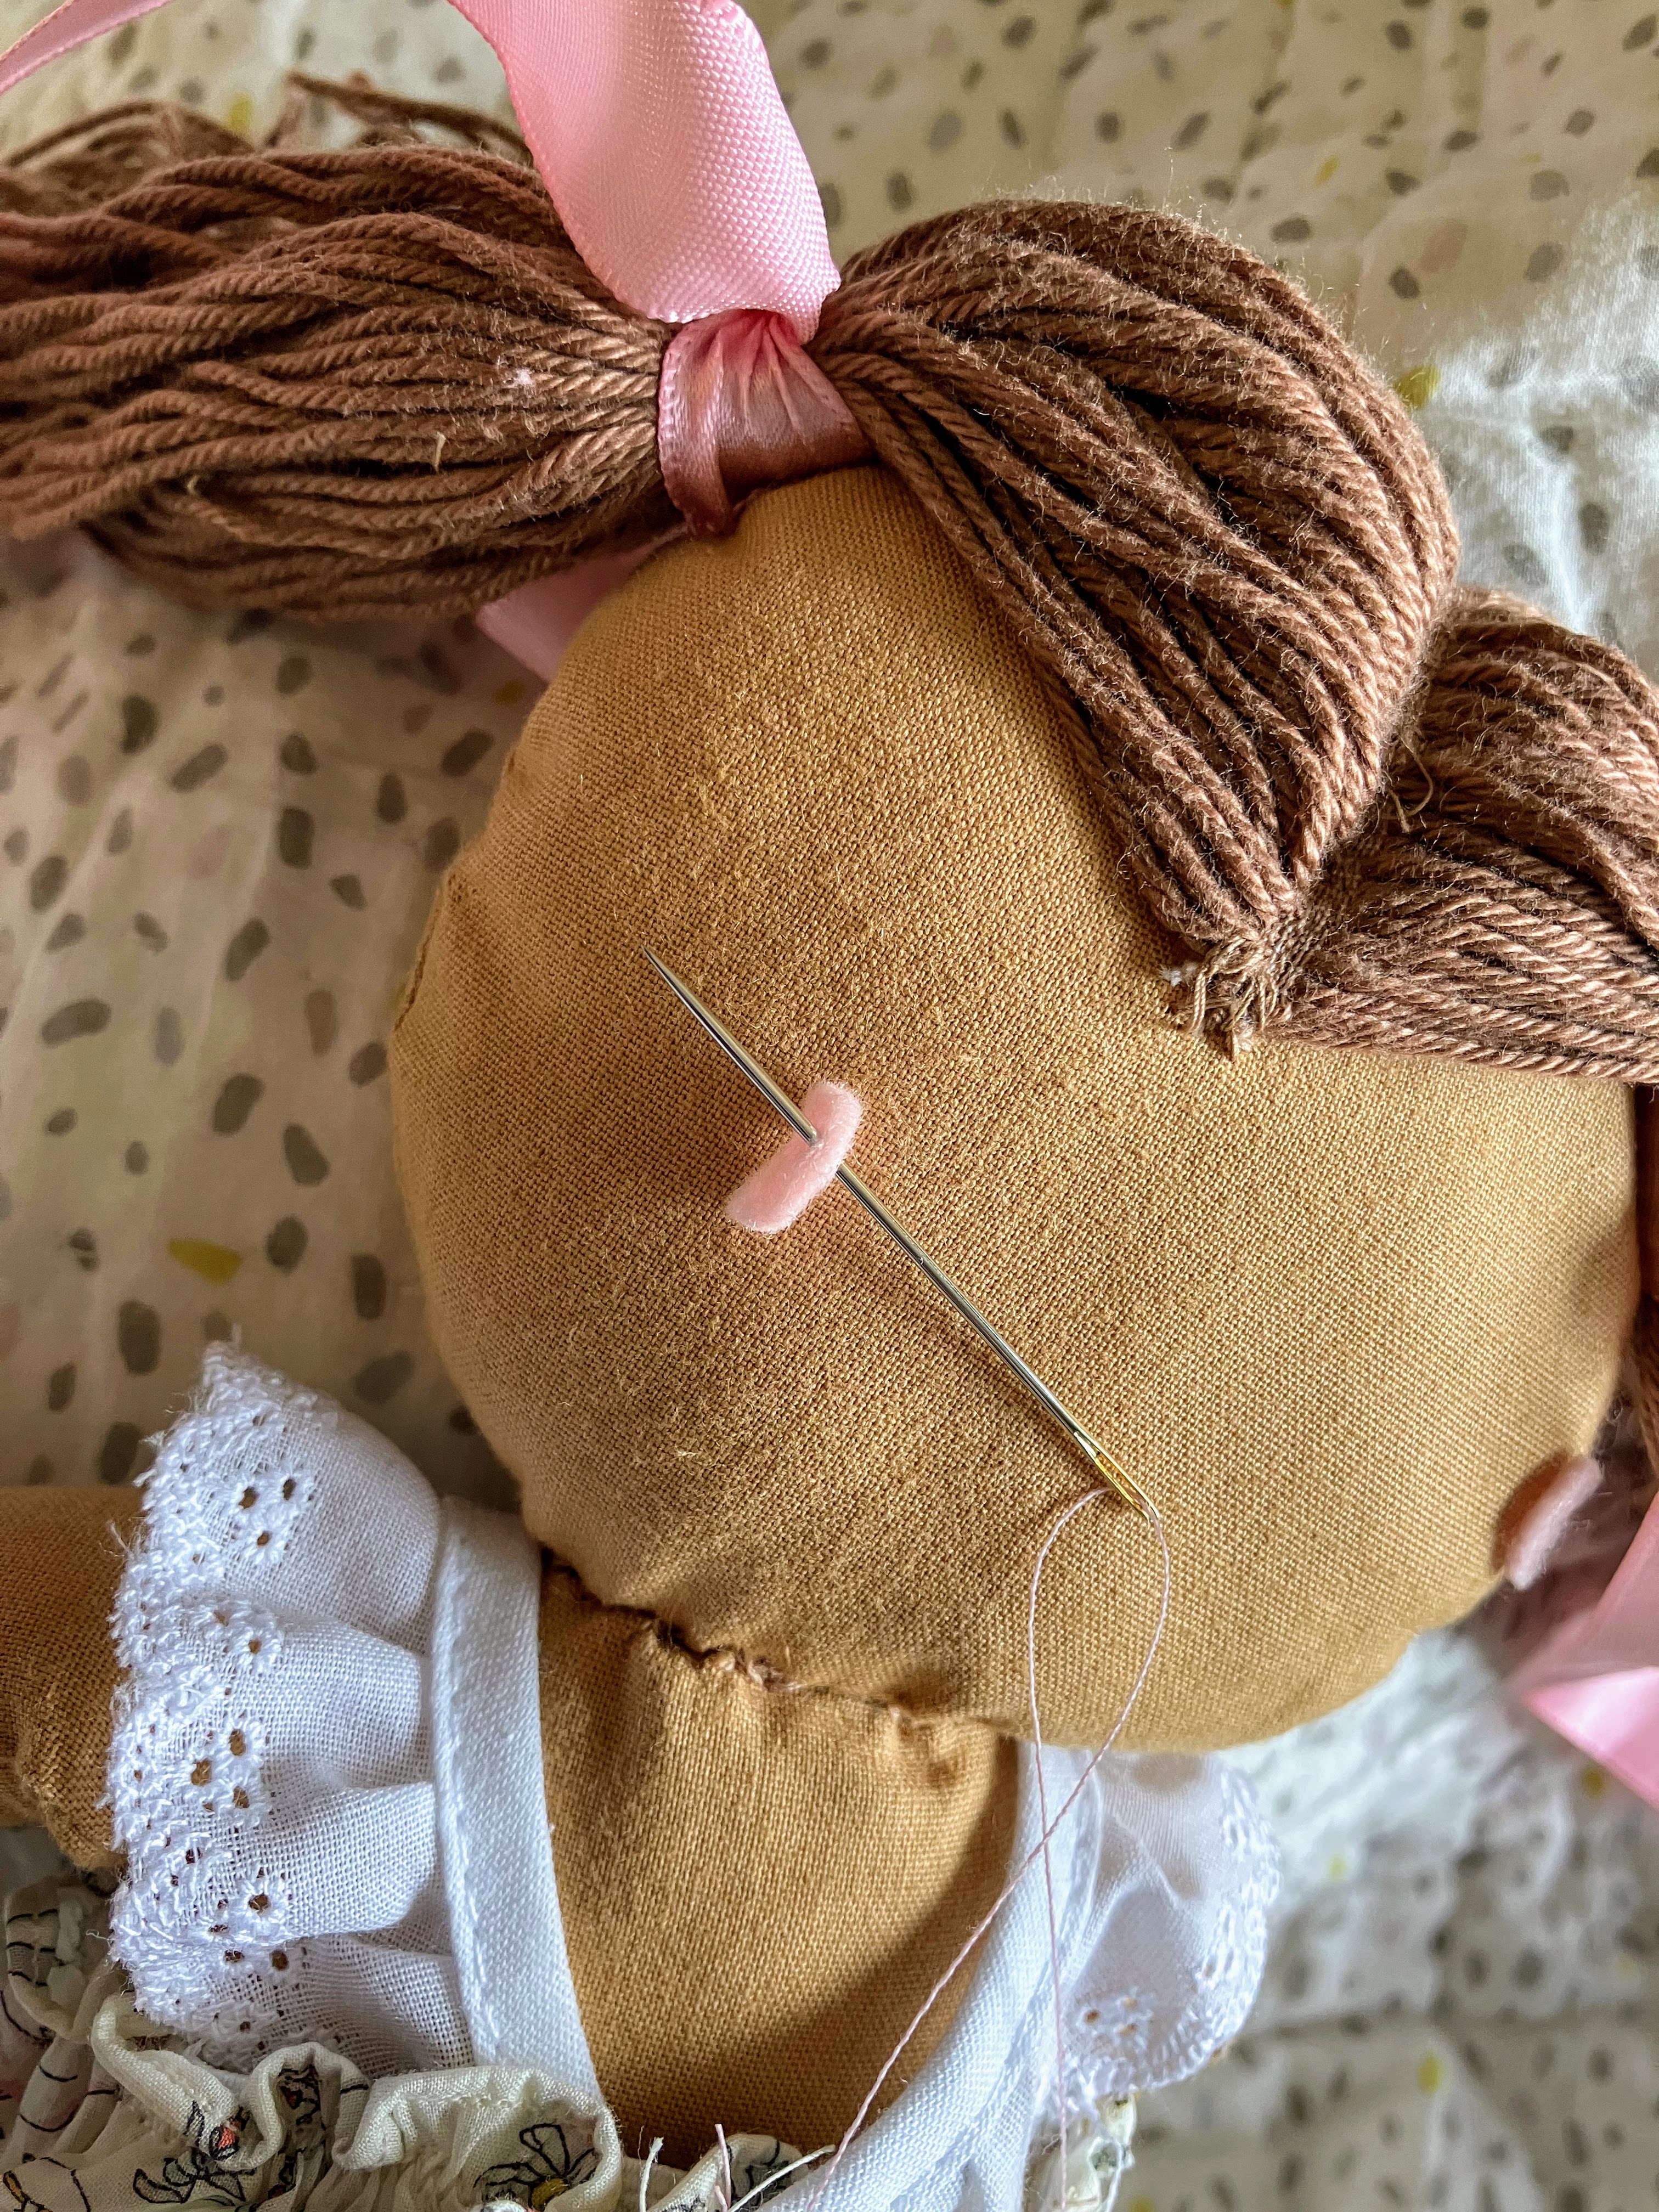
Then, I placed the knot on the underside of the first hearing aid, so it would be hidden between the hearing aid and the doll's head.
Step 4 — Sew Around the Edges
I sewed the first hearing aid on to the doll's head using stitches around the edge.
When it felt secure, I knotted and cut the thread.
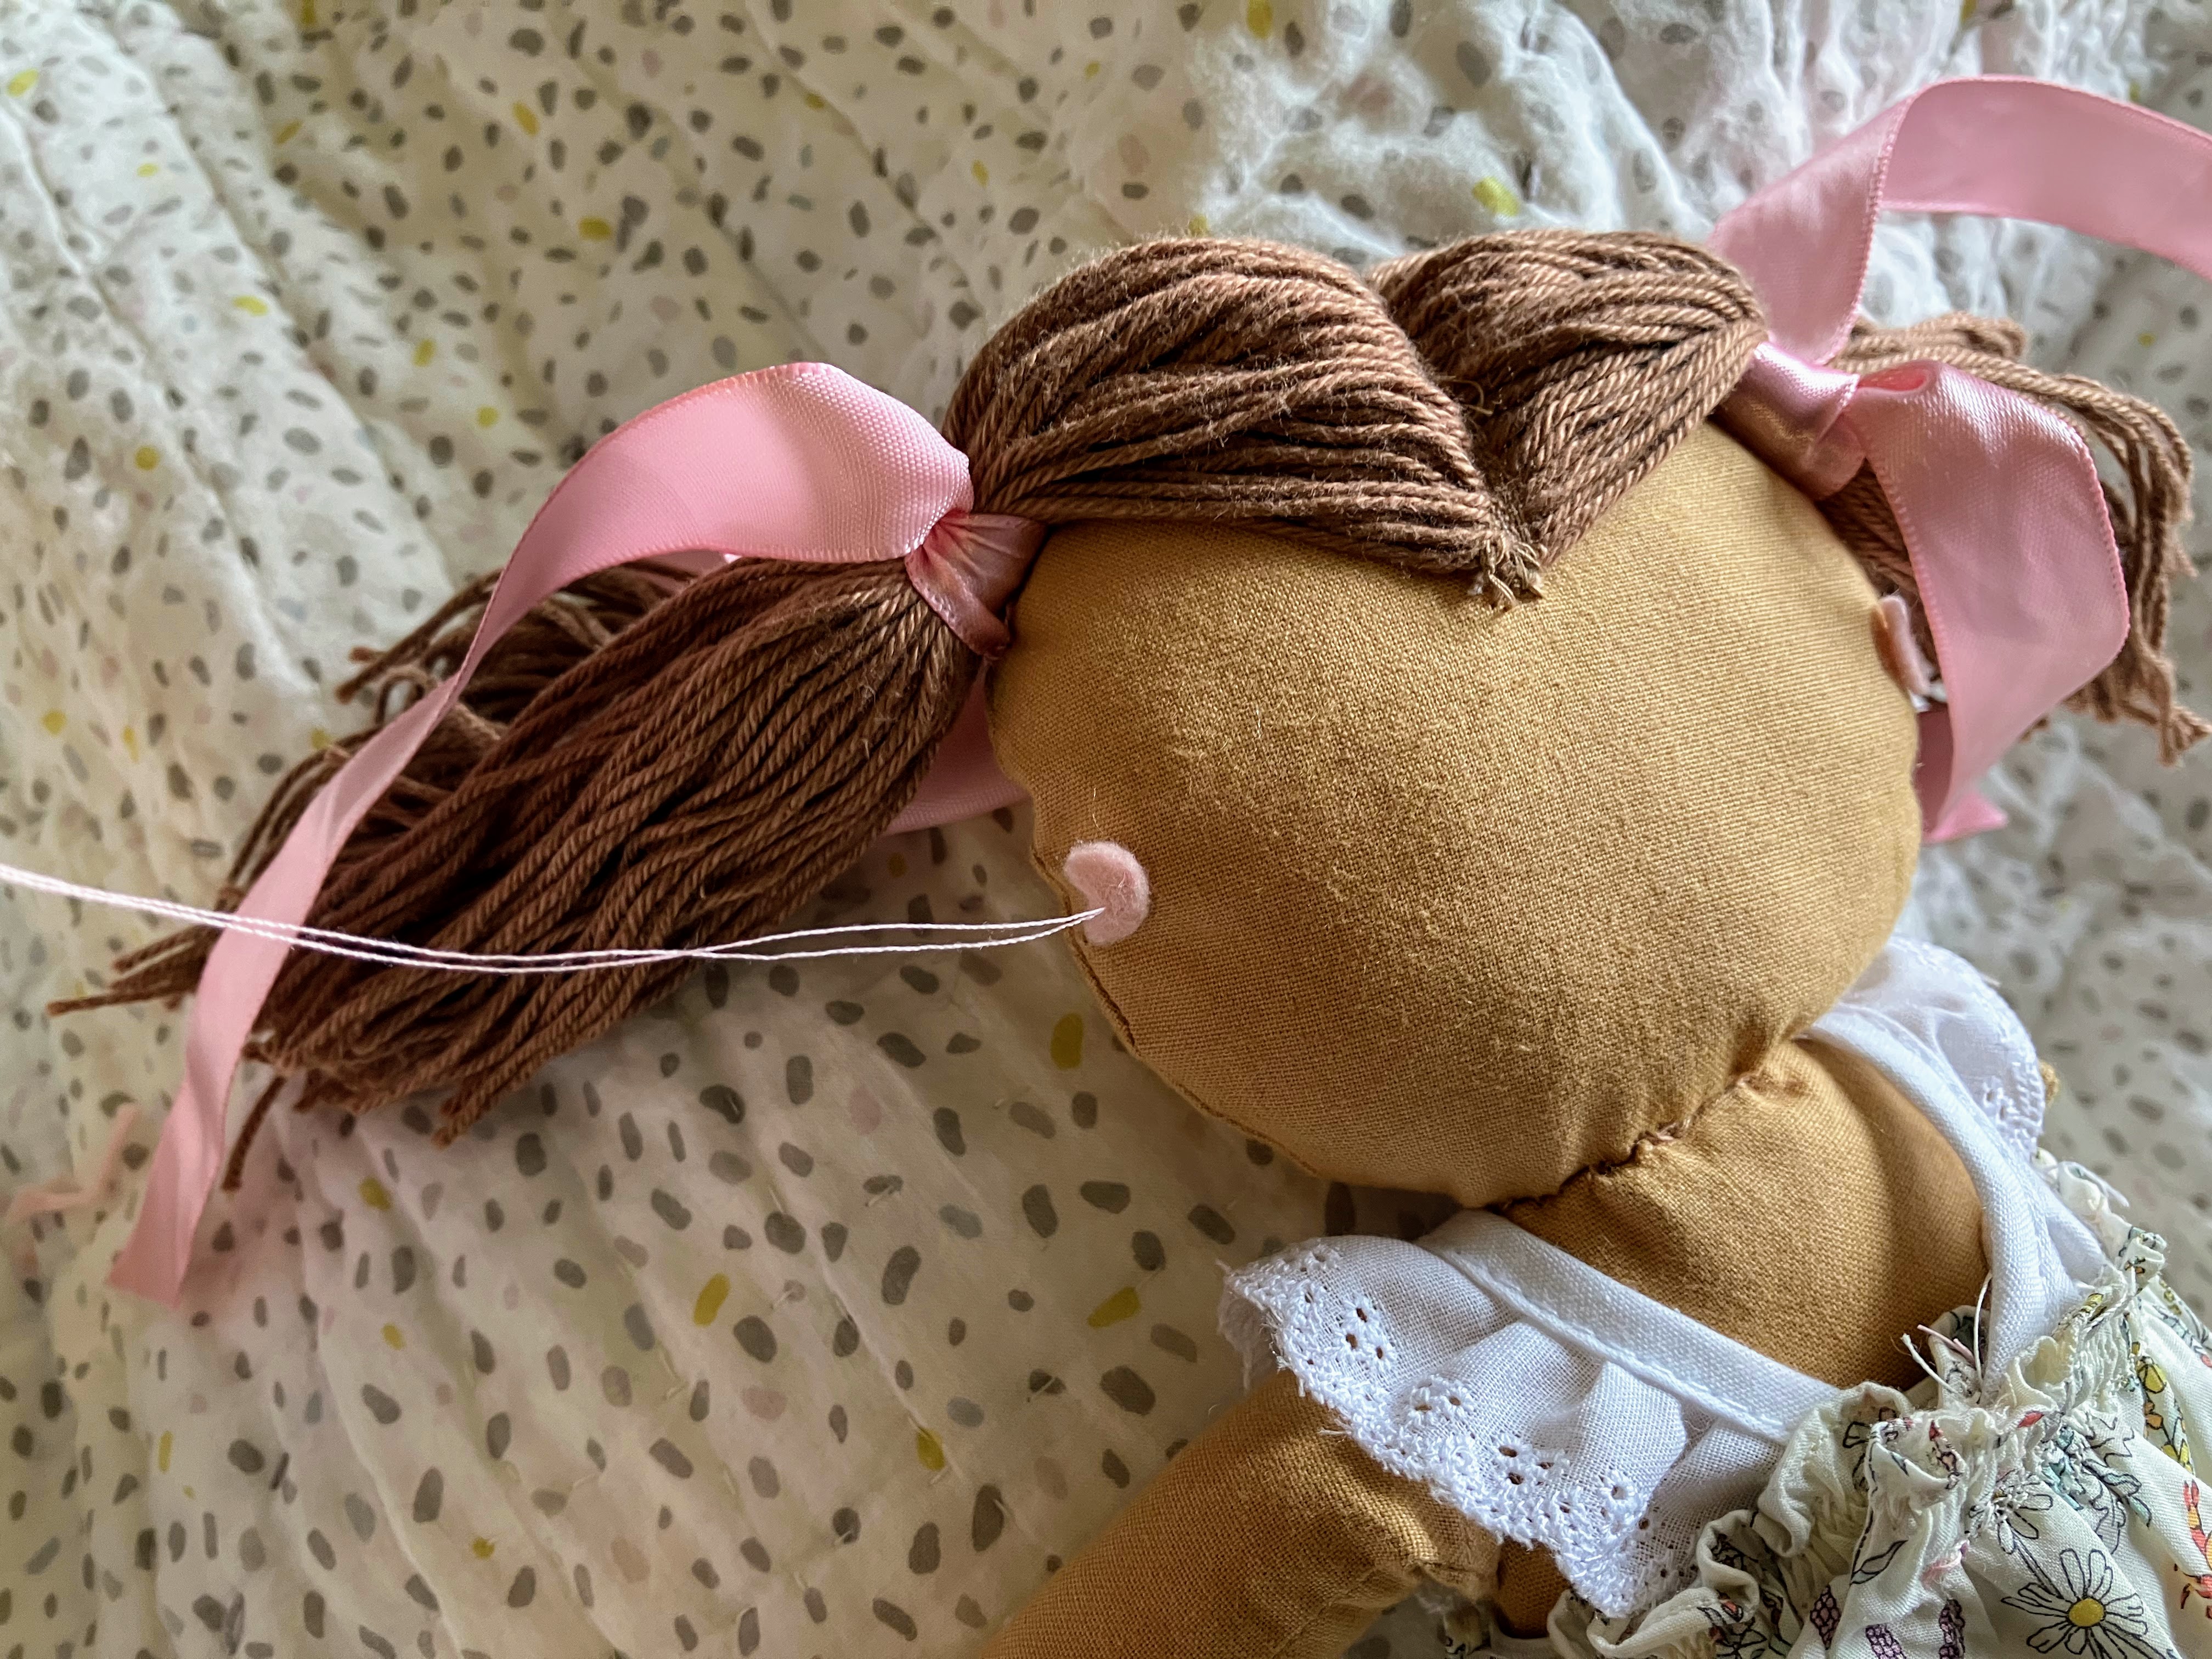
Step 5 — Repeat on the Other Side
Then, I re-threaded my needle, and repeated the same on the other side.
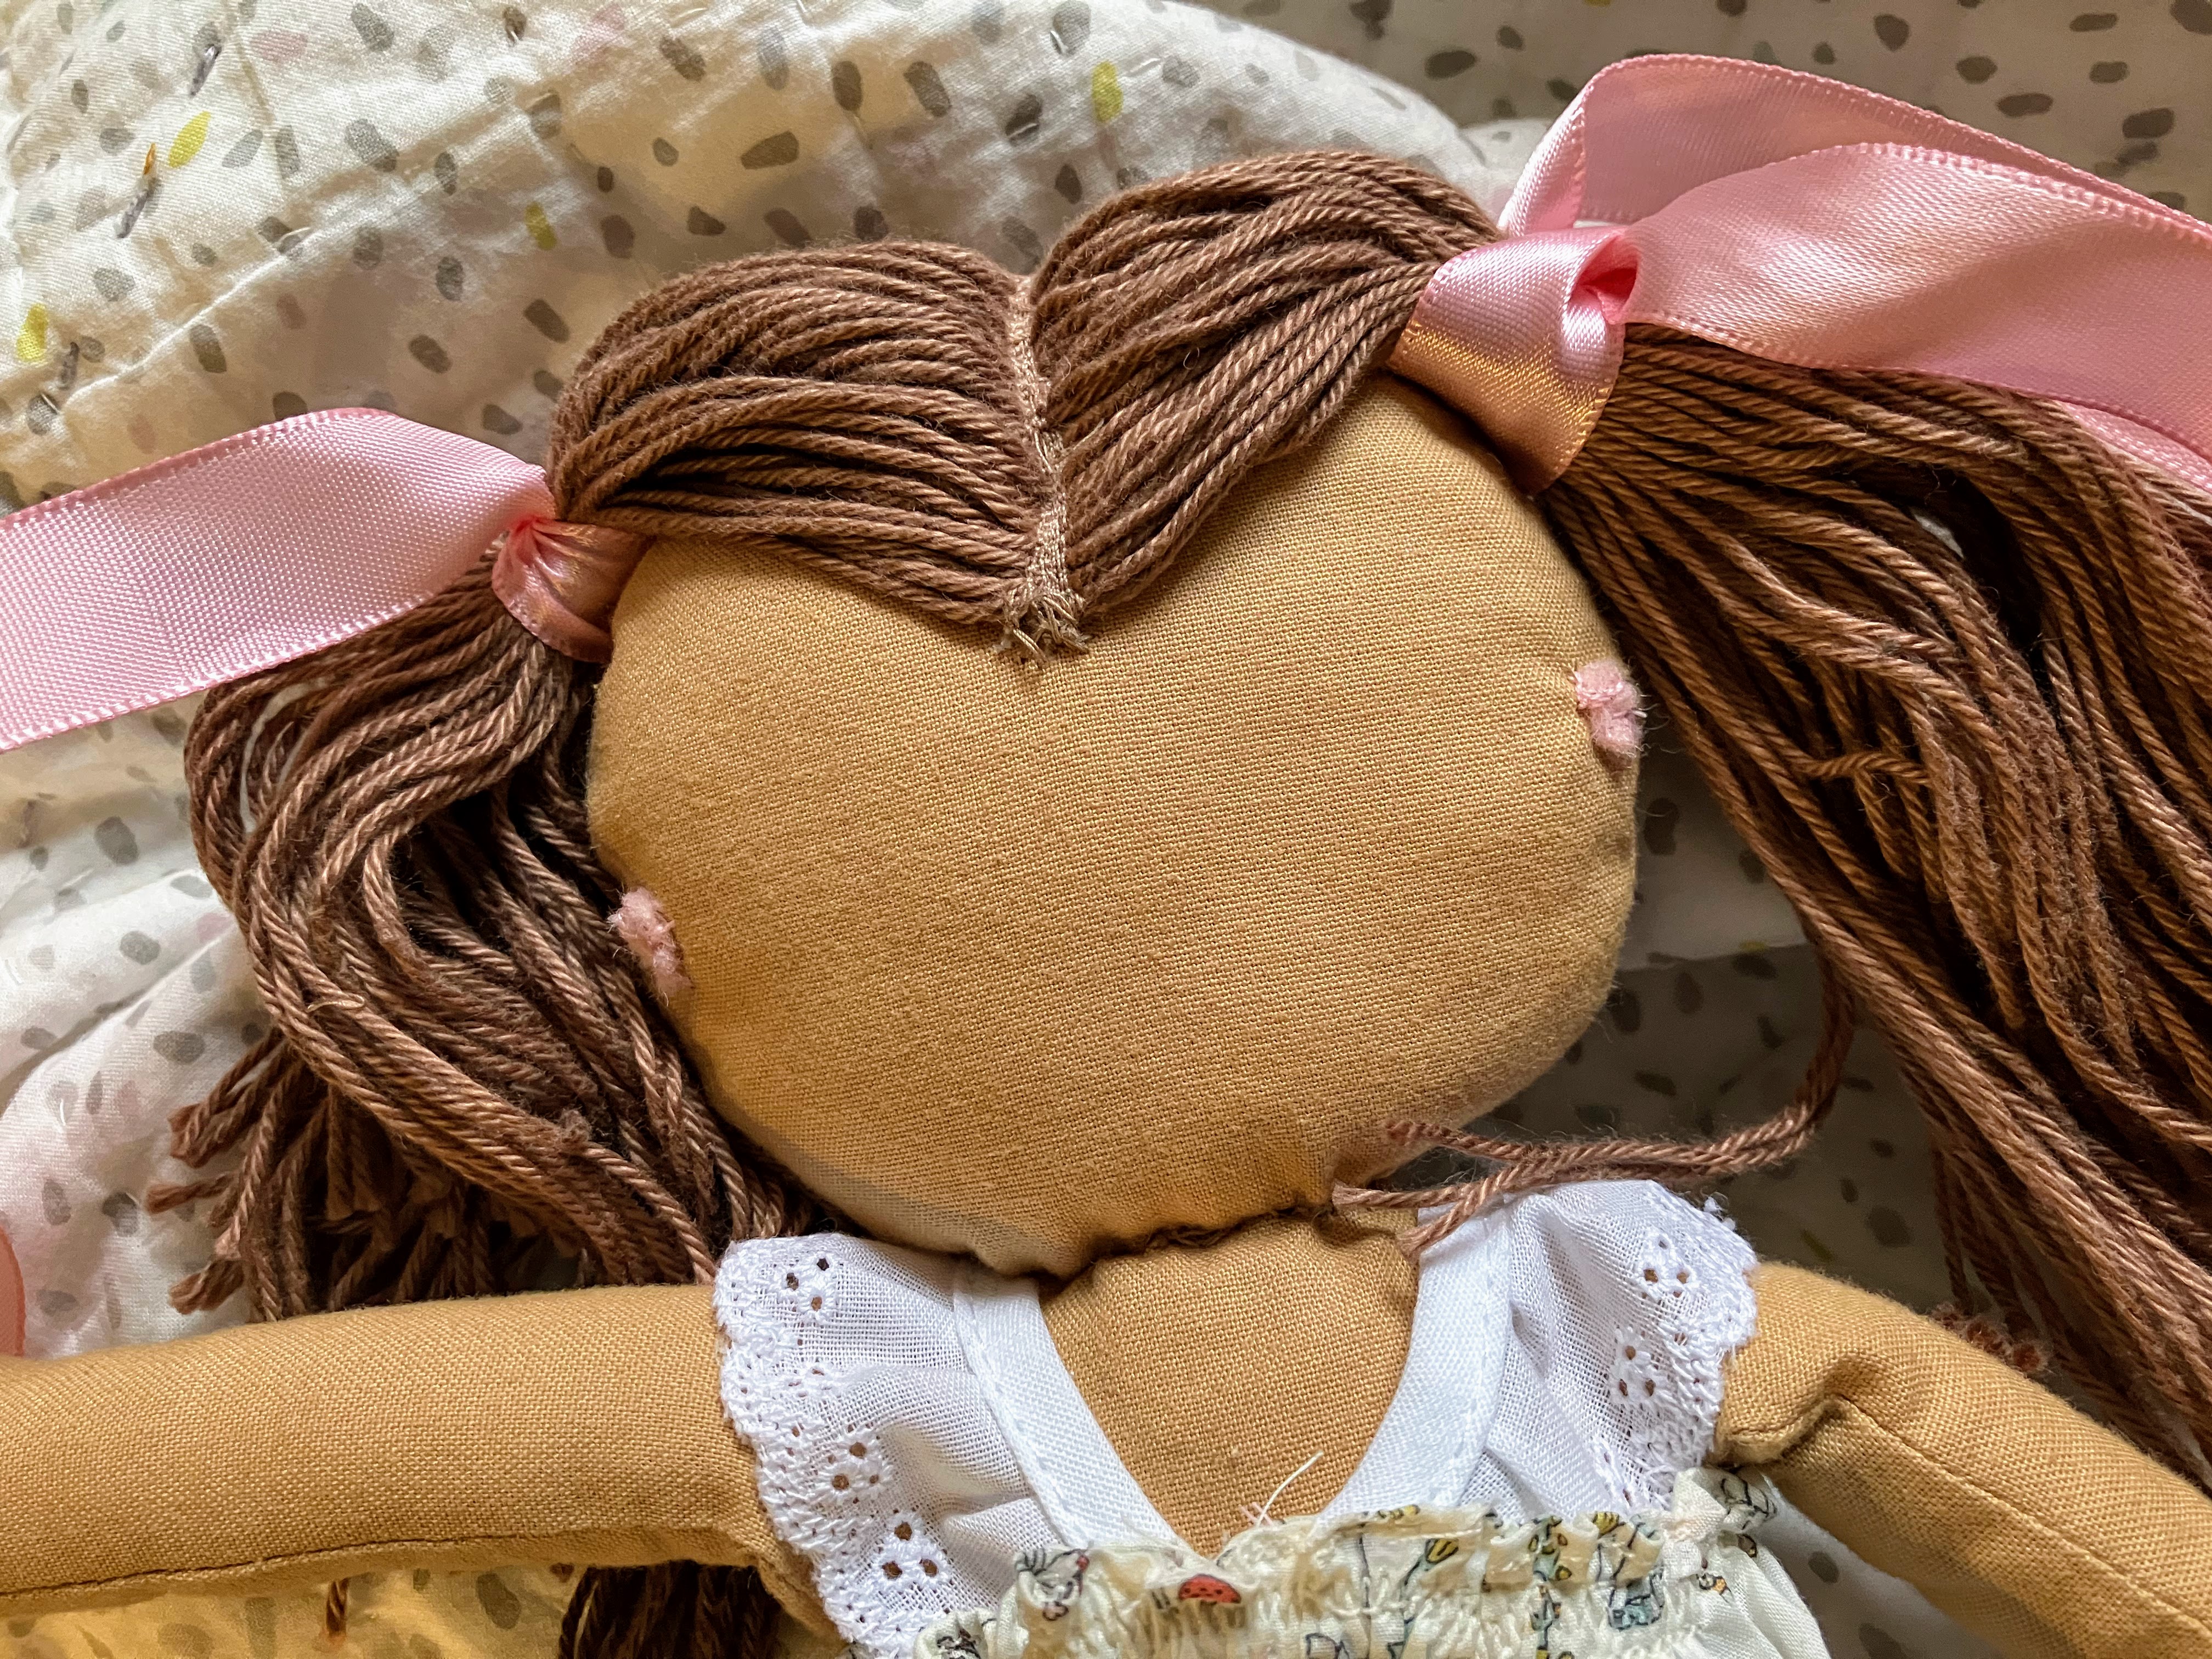
Step 6 - Done!
.jpeg)
Tada! While certainly not perfect (sewing on a miniature scale is quite hard!), I love that dolly now wears hearing aids.
This was so quick and easy, that I plan to add hearing devices to more of her stuffed animals this way!
.jpeg)
Not Into Sewing? Two More Options
The felt method is the fastest, but it's not the only way. If you prefer beads, we have a step-by-step guide using small decorative beads sewn onto a doll's headband—it's a bit more involved but gives a different look.
And if you'd rather buy than make, our roundup of dolls and toys that already come with hearing devices has options across every price range, from Etsy finds to mainstream toy brands.


